How to Install and Configure Simple Voice Chat
How to Install and Configure Simple Voice Chat at MCServerHost
How to Install and Configure Simple Voice Chat at MCServerHost
Playing Minecraft with your friends is a great way to spend your time, and while communicating through text chat is a decent way to connect with each other, it can never beat the convenience and fun of voice chat, allowing each player to talk with each other while playing. To make this possible, server owners can install a plugin/mod on their server known as Simple Voice Chat, which lets nearby players talk with each other in-game using proximity chat.
The plugin is also available for multiple server types (for example, PaperMC, Spigot, Purpur, and many others) and doesn't require much configuration, making it very easy to install on any plugin-based server without any experience in server configuration.
Installing Simple Voice Chat
The quickest way to install Simple Voice Chat is with the dashboard's built-in Plugin Installer, which pulls the plugin straight into your server for you, so there is no need to download or upload any files.
- Log in to your MCServerHost dashboard and select your server.
- Open the Plugin Installer tab.
- In the search bar, search for Simple Voice Chat.
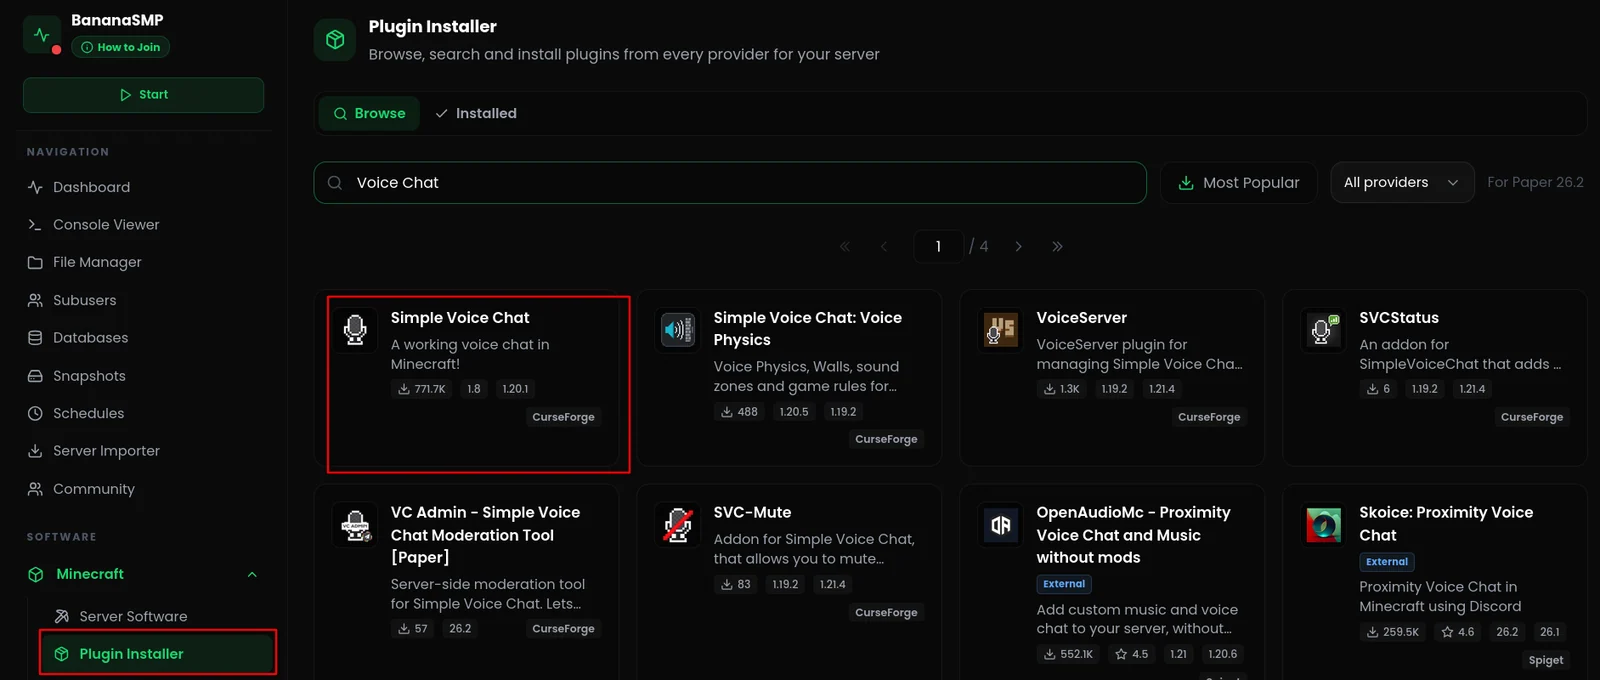
- Click on Simple Voice Chat in the results.
- Click the Install Plugin button.
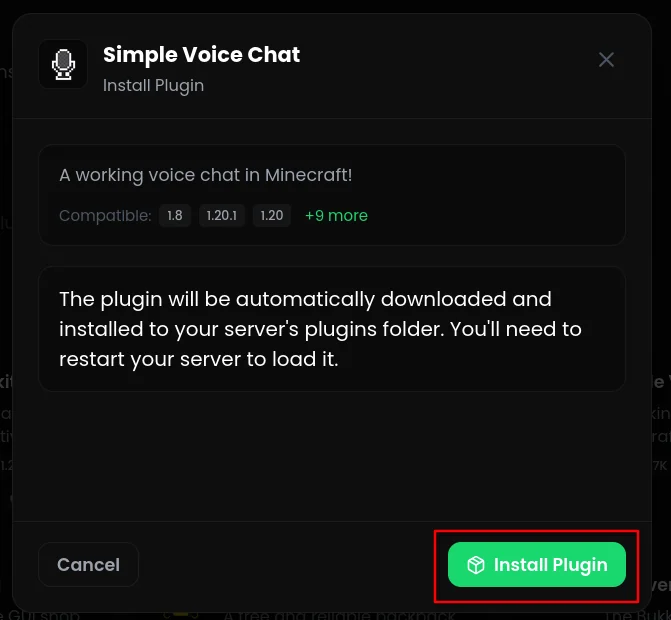
- Restart your server to let the plugin load and create its configuration folder.
Allocating an Additional Port
To allow Simple Voice Chat to work on your server, you have to allocate it a separate port due to the sole reason that it operates independently from Minecraft's built-in networking system. To allocate an additional port to your server, follow the steps below:
- In your MCServerHost dashboard, open Advanced Settings, then select Networking.
- Create a new Allocation and copy the IP and Port from the created allocation (e.g.,
141.95.3.159:10037).
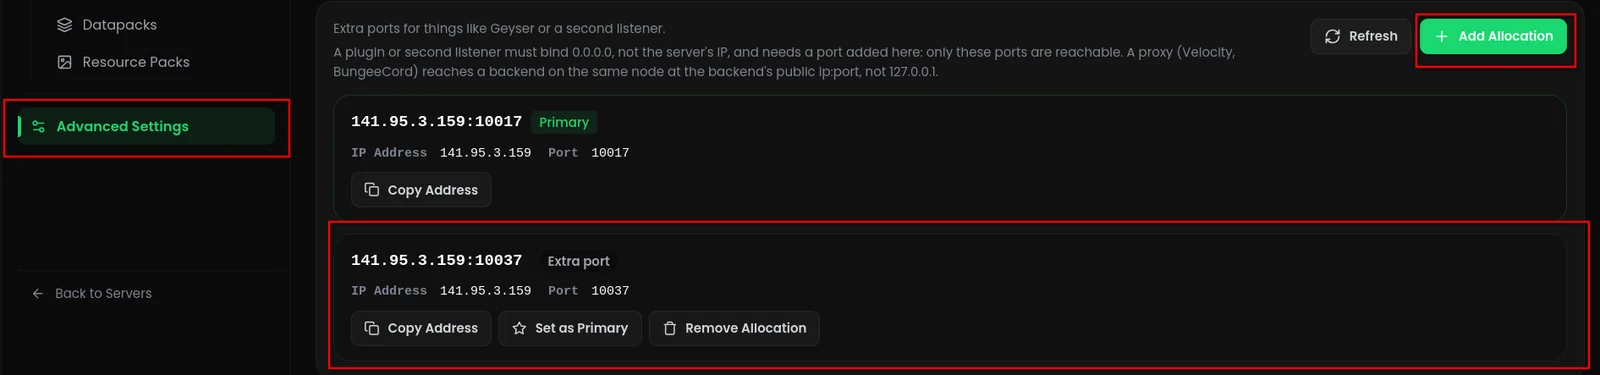
- Note down the newly allocated IP and port numbers before proceeding to the next step.
Configuring Simple Voice Chat
After installing the plugin/mod into your server and allocating an additional port, you can start configuring Simple Voice Chat on your server by editing its properties in its configuration file. To do that, follow the steps given below:
Go to your server's File Manager (
Files) and locatevoicechat-server.properties. The exact path depends on your server architecture:- Plugin-based server:
Files->plugins->voicechat->voicechat-server.properties - Mod-based server:
Files->mods->voicechat->voicechat-server.properties
- Plugin-based server:
Inside the
voicechat-server.propertiesfile, edit the following fields:- Set
voice-host:to yournumericServerIP:secondaryServerPort(e.g.,141.95.3.159:10037) - Set
port:to yoursecondaryServerPort(e.g.,10037)
- Set
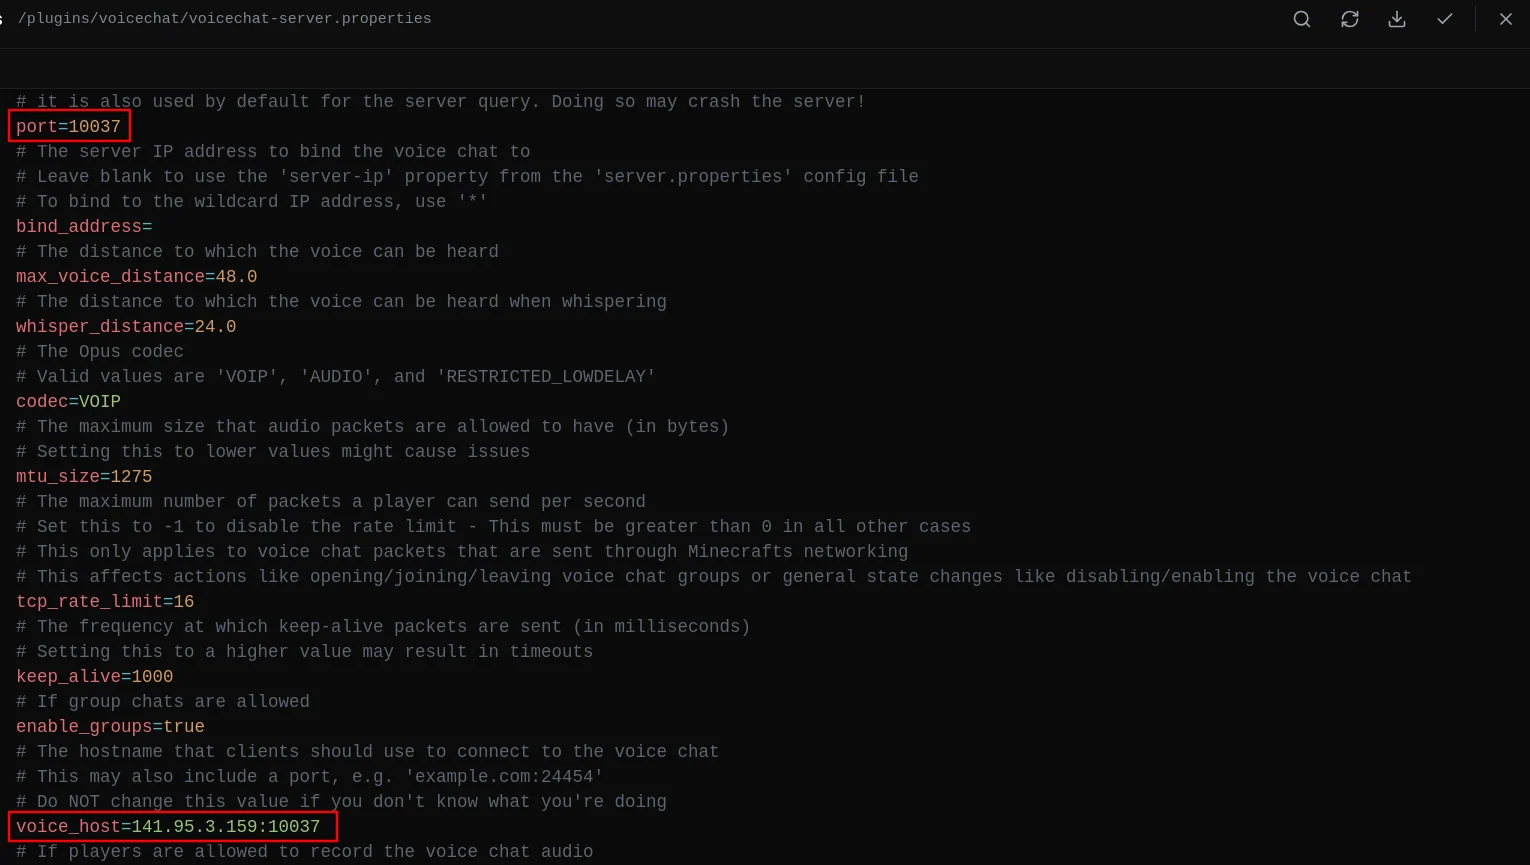
- Save the changes, and start or restart your server in order to let the changes take place.
Conclusion
After following all the steps highlighted in this guide, you will be able to install and configure Simple Voice Chat on your Minecraft server without any type of error. Just make sure you have allocated the extra port and edited the configuration file correctly.
Similarly, if you are having any type of issue or problem with your server at MCServerHost, you can always get in touch with us by joining our Discord server or writing to us at support@MCServerHost.com.
Related guides
- How to Ban, Kick and Mute Players on Your Minecraft Server: How to Ban, Kick and Mute Players on Your Minecraft Server at MCServerHost
- Resetting The End in Minecraft: Learn how to safely reset The End dimension without affecting the Overworld.
- How to Set Up ServerLinksZ on Your Minecraft Server: Fill the Server Links pause-menu section with your Discord, Website, Store, and Rules.
- How to Set Up InventoryRollbackPlus on Your Minecraft Server: Auto-back up player inventories so staff can restore items lost to lag, deaths, or griefing.